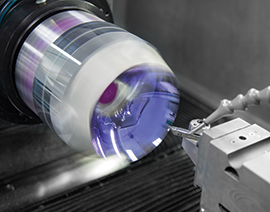
Roughness of Diamond Turned Off-Axis Parabolic Mirrors

Single Point Diamond Turning is a manufacturing technique for producing off-axis parabolic (OAP) mirrors, off-axis elliptical (OAE) mirrors, and other precision metal optical components. While the goal of any optical manufacturing technique is to create an ideal surface that does not deviate from its theoretical surface profile, Diamond Turning, like other manufacturing techniques, is subject to manufacturing errors that prevent the ideal surface from being produced. These surface errors can typically be classified by their frequency content, specifically as low, mid, or high spatial frequency errors.
Spatial Frequency Errors
Low spatial frequency errors, described by terms like surface figure, irregularity, and even Zernike polynomials, force an incoming wave to deform and take on a wavefront similar to the profile of the optic. Mid spatial frequency errors, or ripples, are typically caused by a tool removing or shaping material on a surface. Mid frequency errors occur periodically with roughly the same spacing as the stepping distance of the tool used to alter the surface, and can adversely affect image quality.
High spatial frequency errors, often referred to as roughness and measured in Angstrom RMS, tend to cause light to scatter unintentionally. The greater the error, the wider the potential scatter angle. This form of scattering is wavelength dependent and scatter angles increase as the wavelength of incident light is decreased.
In metal manufacturing processes, roughness is often associated with the “shininess” of a part. The surface of rough parts typically appear hazy or cloudy, but if a part is particularly rough, a greater percentage of light will deviate from its intended target. When a rough surface is used as a focusing optical element, an overall decrease in the MTF of an image occurs. Rough surfaces can even lead to an overall decrease in throughput.
Diamond Turning
Diamond turned optical components are polished differently than traditionally manufactured optical components. Diamond turning is a manufacturing technique that allows for the creation of unique and precise non-spherical glass and metal shapes, but suffers from the possibility of poor surface roughness. If care is not taken during design and diamond turning, a surface can have a roughness of hundreds of Angstroms (Å). Because scatter in the high frequency domain is wavelength dependent, a roughness of a few hundred Å may be unsuitable for visible light applications, whereas little to no scatter may exist for systems operating in the Infrared (IR). When optics are carefully designed and skillfully diamond turned, surface roughness less than 100 Å can be achieved. With a lower surface roughness, an optic will have minimized scatter in the visible spectrum. However, if an application utilizes light from the lower end of the visible spectrum, or even the Ultraviolet (UV), 100 Å may present an unacceptable level of scatter. The roughness of the highest precision diamond turned components can be brought below 50Å and can be further improved by nickel plating a surface. It is generally accepted that polished glass will have a roughness of between 20-50 Å.
The figures below provide a visualization of the difference between a surface with <50 Å roughness and a surface with <100 Å roughness.

Figure 1: Surface Map of <50 Å RMS Roughness

Figure 2: Surface Map <100 Å RMS Roughness
Edmund Optics’ optical design and diamond turning staff are experienced at minimizing roughness and other errors introduced in the diamond turning process. Along with our standard offering of diamond turned mirrors, customized solutions are available including custom sizes and shapes and a variety of metal mirror coatings. Contact us today to speak with an expert or receive a quote.
版权所有 © 2024 江阴韵翔光电技术有限公司 备案号:苏ICP备16003332号-1 技术支持:化工仪器网 管理登陆 GoogleSitemap